Home Automations

One light is shared between 2 light switches – Never walk in a dark bassement again

When you take some walls down in your basement, you usually have some switches and dimmers as well as some themostats and wall plugs that needs to be moved around. Since you are already getting an electrician to do some rewireing might as well plan ahead and think about where you want your plugs, your light switches and your thermostats to go.

Thats excatly what i did when i teared my walls down. I asked the electrician to wire one of the lights separately and change the single box i had at the bottom of the stairs for a 3 gang box. Also got him to move one switch from one side of the wall to the other side to make turning lights on easier.

Its a big project like every revovations one can attempt. There is a lot of thing involved but in my case, theses walls where blocking a basement window and the outside light. There was no way i could potentially leave this the way it was.

The hardware used

For the hardware, i already had one Martin Jerry Smart switch installed and a MArtin Jerry smart dimmer. Both of theses where flashed with tasmota firmware and where already into home assistant.

Add to that a shelly 2.5 relay wired instead of the 3rd light switch and you have a light that can not be controlled by a switch but only via a web interface or via home assistant. I left the stock firmware on thatrelay cause its good enough for what i needed. The relay module contains 2 relays and can control up to two lights but i’m only using one single relay on it. The other one is unused.


Seting this up into home assistant

If we now jump to home assistant, i’m not going to share the automation.yaml file for now. I’d rather show you directly in the GUI as its more easier for peoples that are new to home assistant.

Otherwise there is also the posibilit if setting this up via the Gui. I will include a snapshot below the code if you whish to do it that way instead. Please note that i’m using version 2023.08.03 as of last week. If you are using an older version your screen might look different in the Gui.


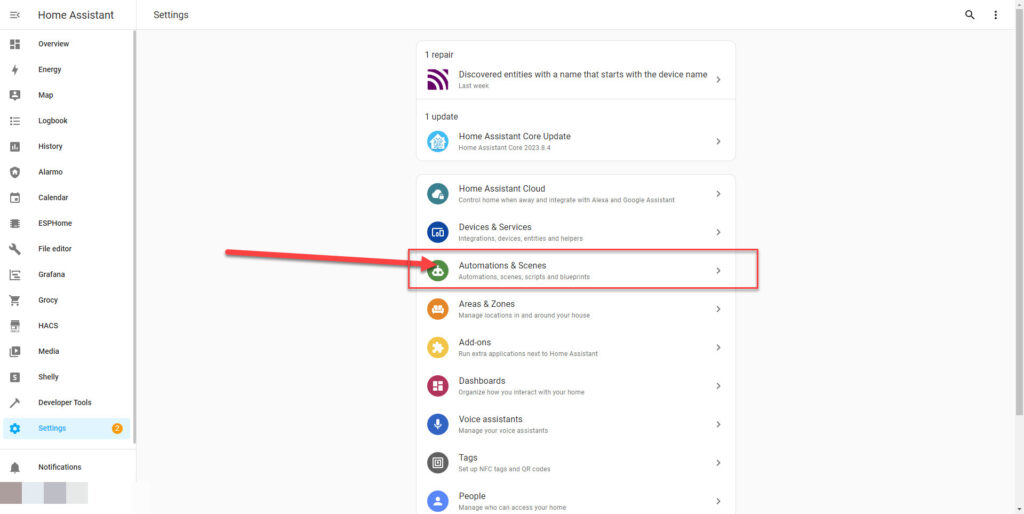
1 – Start by clicking “Settings” on the left menu bar.

2 – Then click on “Automations and Scenes”

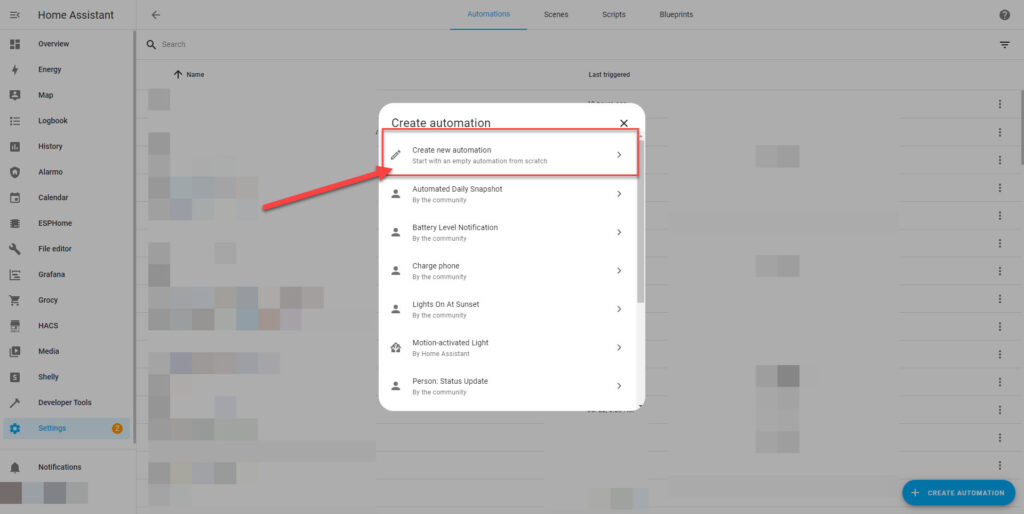
3 – Then click on “Create Automation”

4 – Then select “Create New Automation”

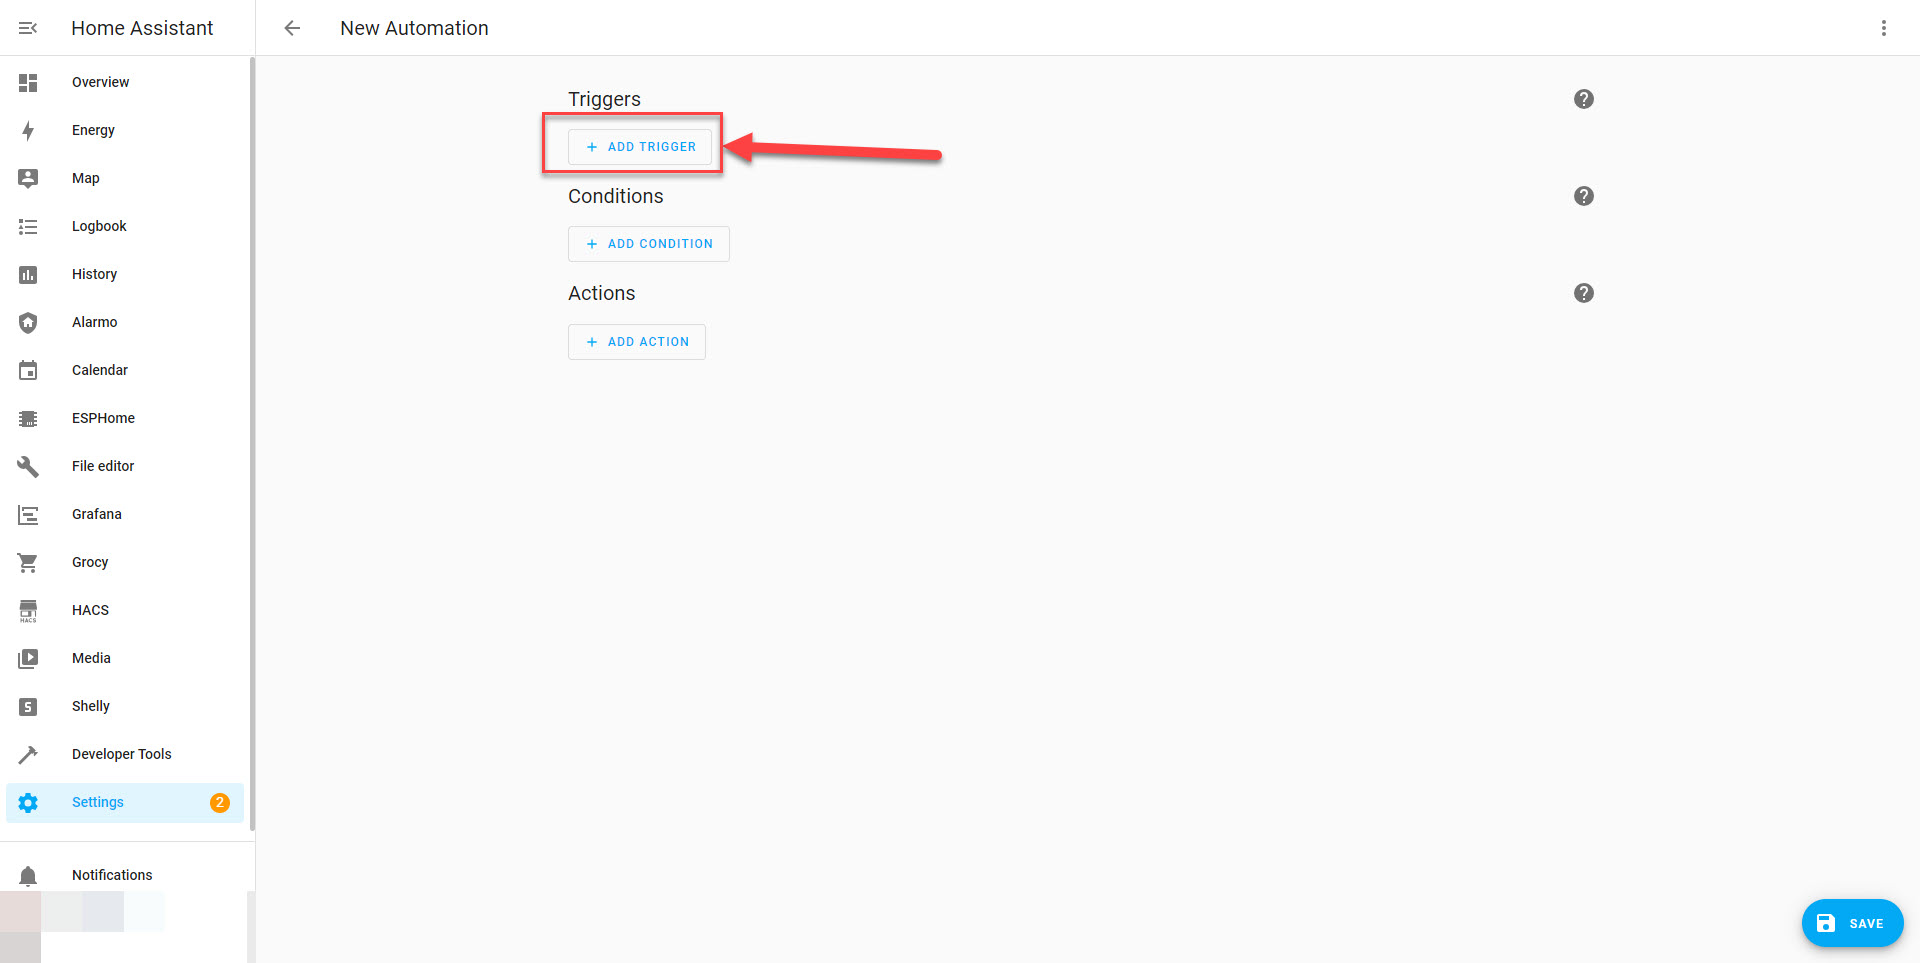
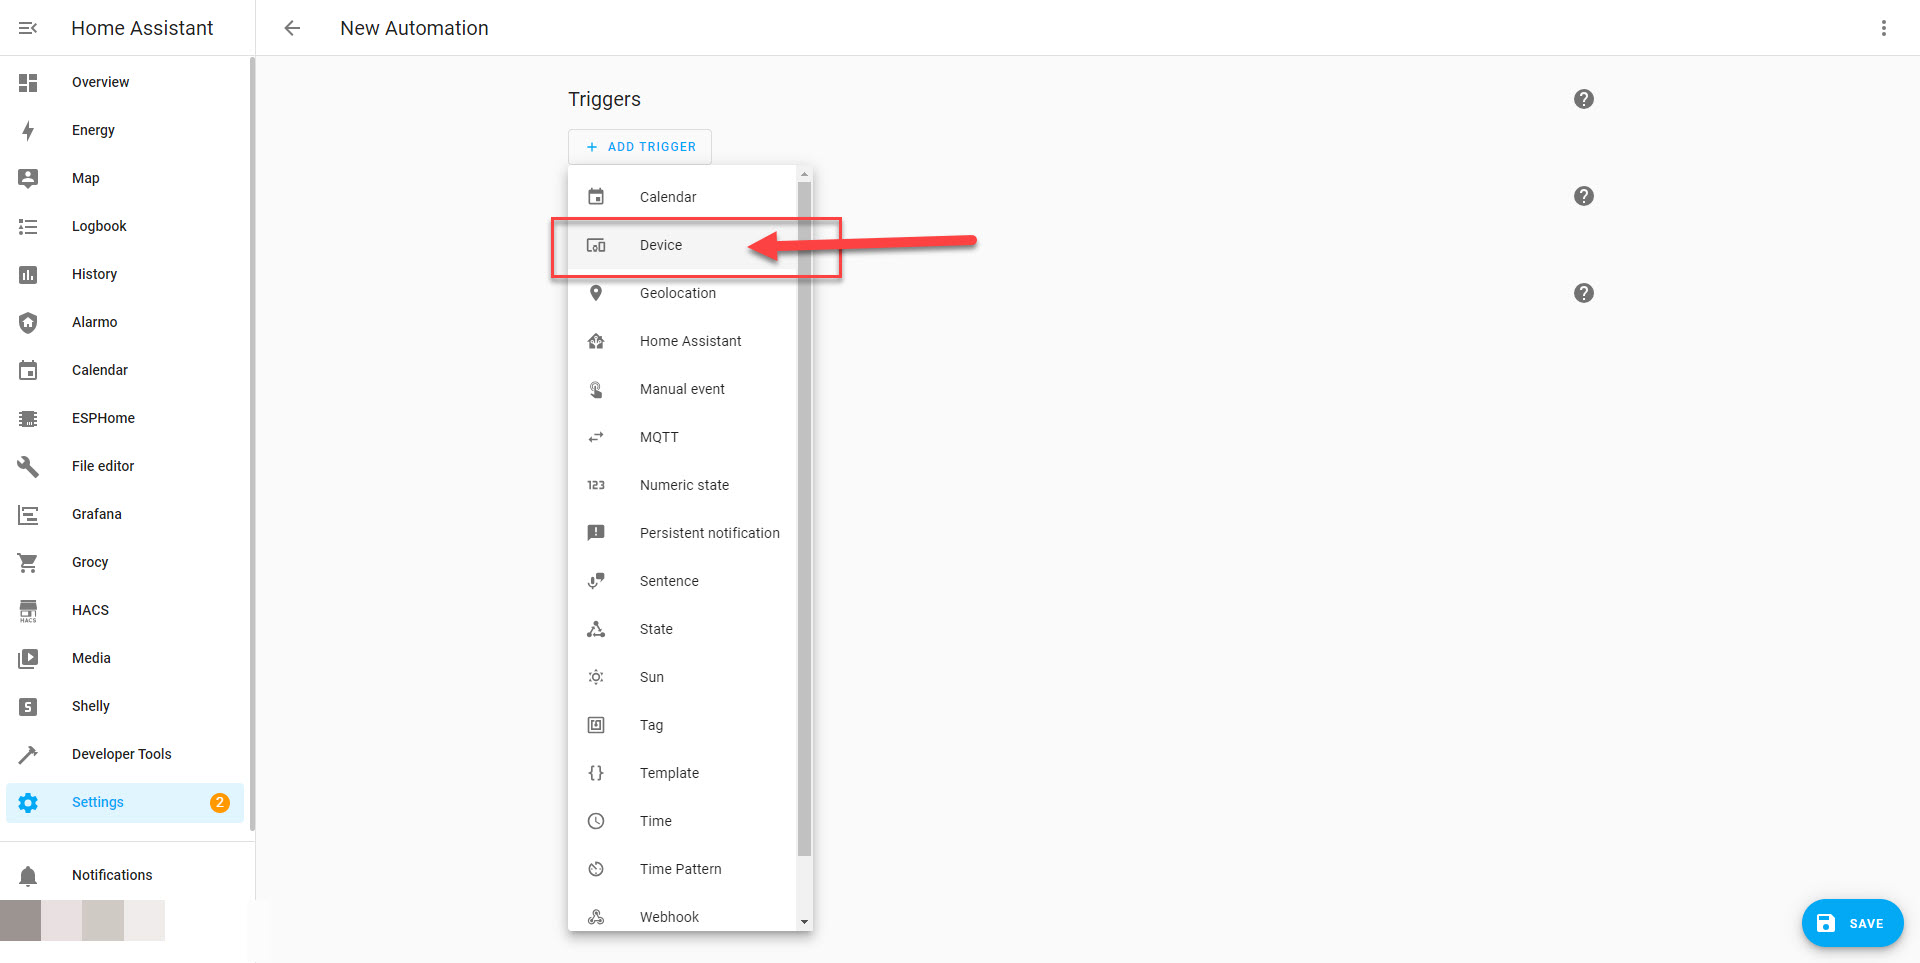
5- Then we need to add triggers that will trigger the automation. Click on the add trigger button.

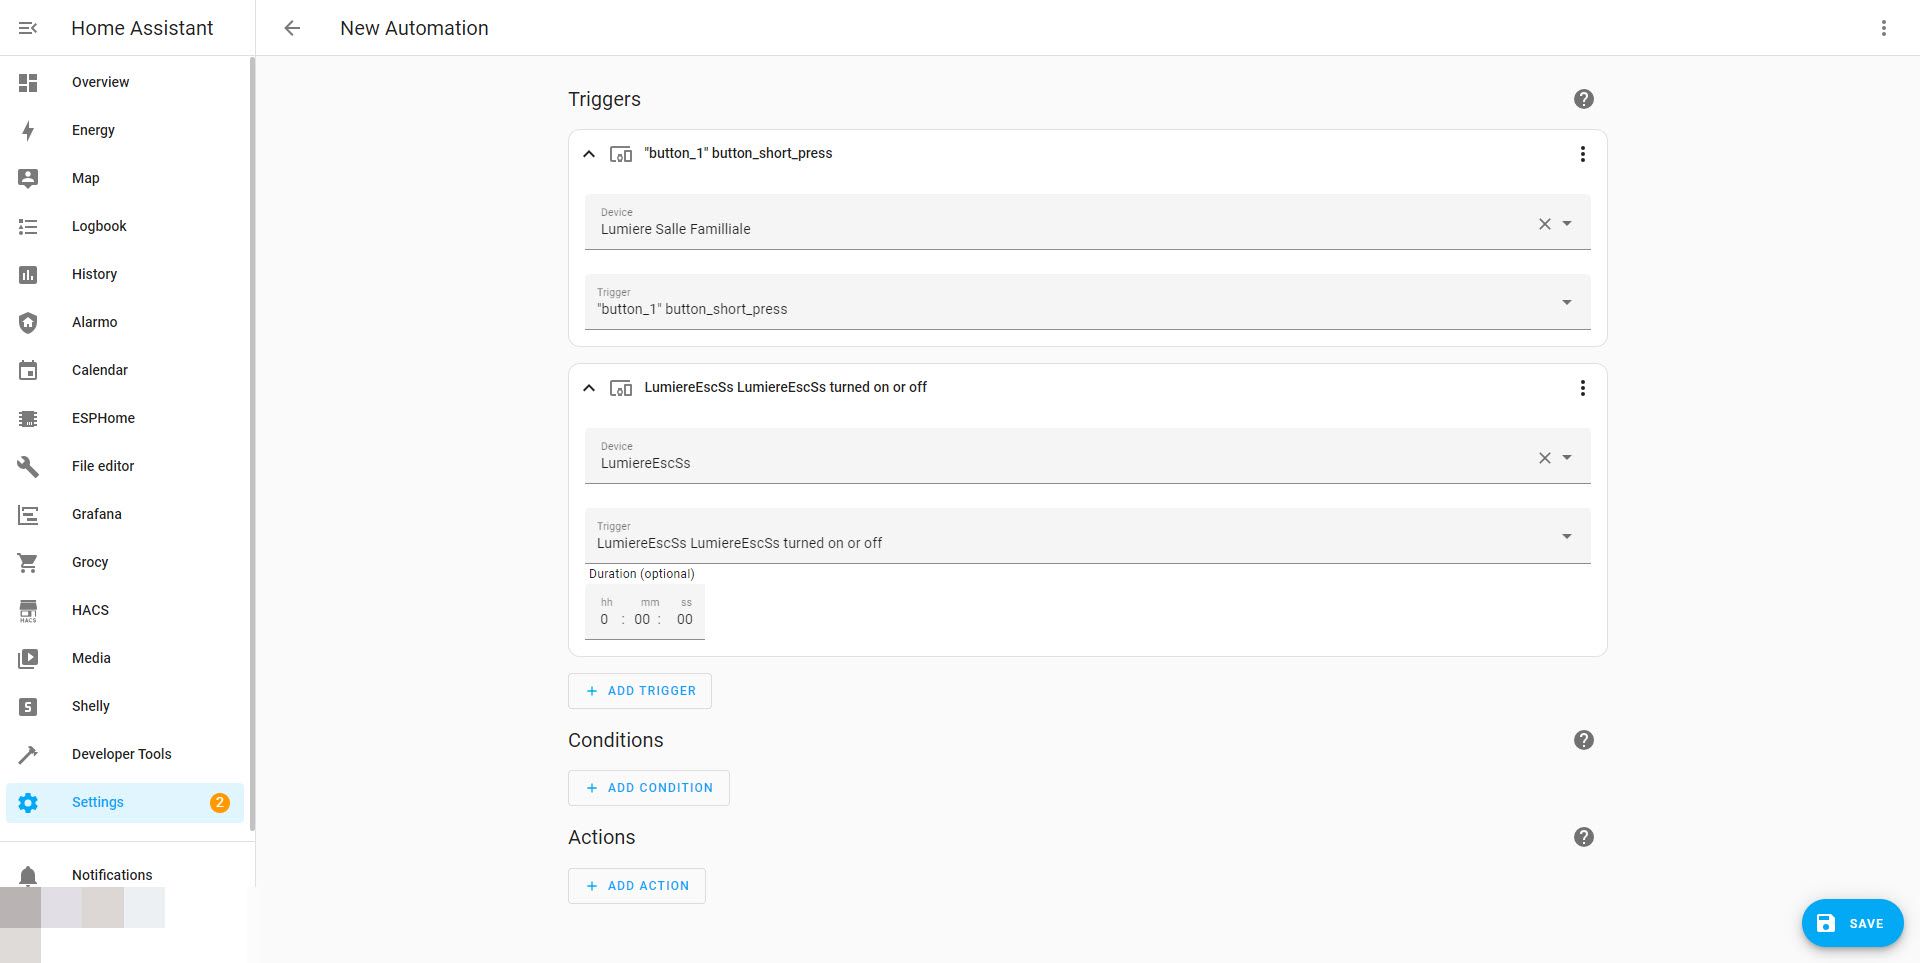
6- Now we need to trigger this automation whenever someone presses a button for either one of the light switches that will be controlling this relay. So we select “Device” as the Trigger.

7 – We then select or First device that will be firing this automation and for the trigger you will have to choose what will be triggering the automation on this device. If you have multipress setup the options will be different that if you have only a regular single press switch setup.

8 – We then do the same for the second device.  (Note that we are not setting any conditions yet. We just want to trigger as soon as someone hits one of theses light switch with a press.)